Complete ChatGPT Business Profile Setup Guide: 6 Steps to Claim and Optimize Your Business on ChatGPT
Here’s how to claim and optimize your ChatGPT Business Profile. There isn’t much to it yet, so it’s not as cumbersome as Google Business Profile, Apple Business Connect, Facebook Business Page, or other business profiles.
Do these 6 steps on a desktop computer (although you can do the setup and verification on mobile, I only see the profile dashboard on desktop after you set it up – or maybe it’s just me or Android)…
click to skip to section
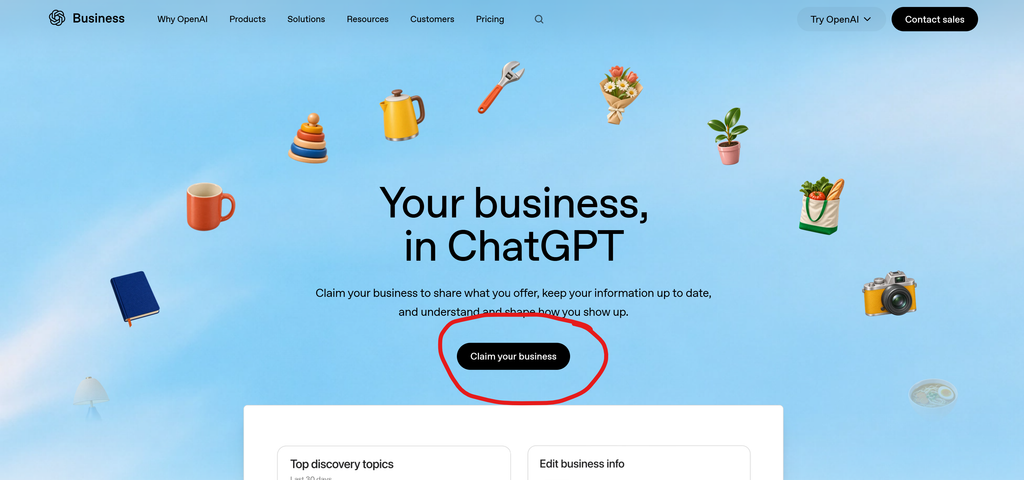
1. Claim
Go here to sign up: https://openai.com/business/businesses-in-chatgpt/
2. Name
Type in your business name exactly as on Google Business Profile. When your business pops up, select it.
3. Verify
Verify via phone. And if asked, say you are an individual not an LLC or business entity (which seems to complicate and glitch up the process, and is unnecessary for this). Or verify via website if you can do that. Then you can skip step 6.F. below because it will already be done. But if you can’t do that and need to keep it movin’, you can verify via phone, then come back to website verification.
4. Accessing Your Profile
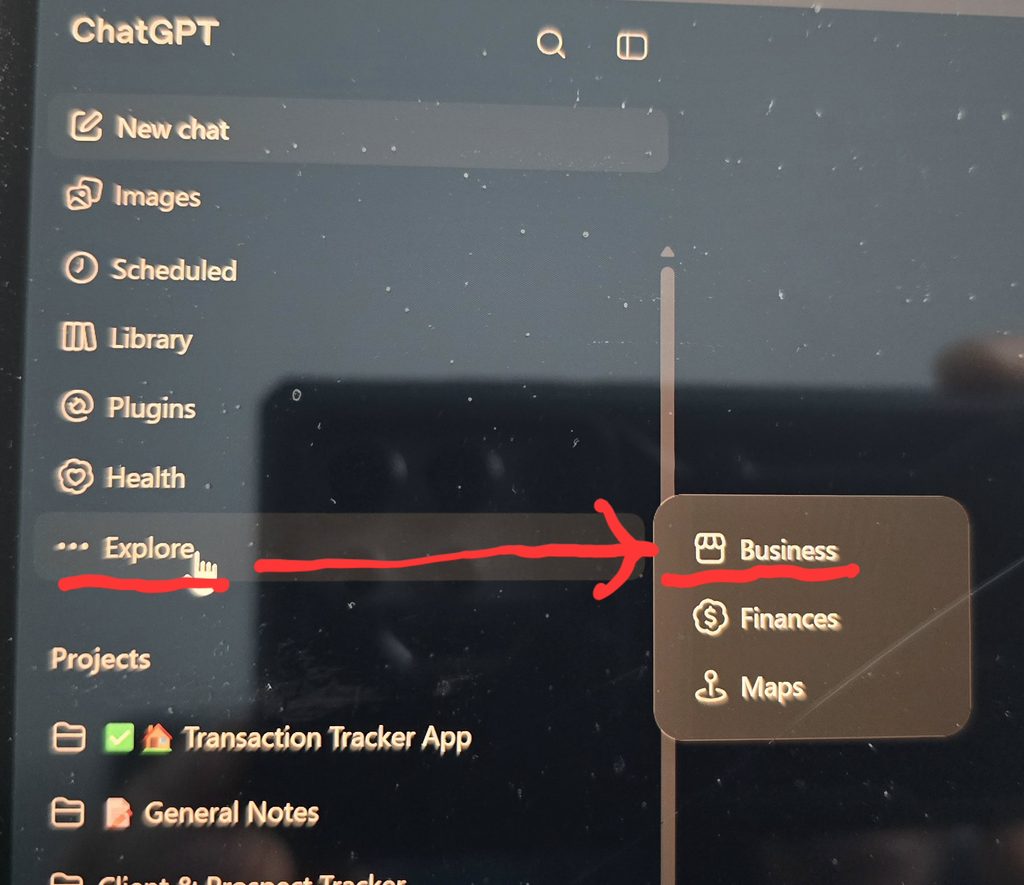
Once initial sign up and verification is done, you should be able to access your ChatGPT Business Profile in your regular ChatGPT app or browser under “Explore”, then “Business”. (again, I think the dashboard is only available on desktop right now)
5. More Verification
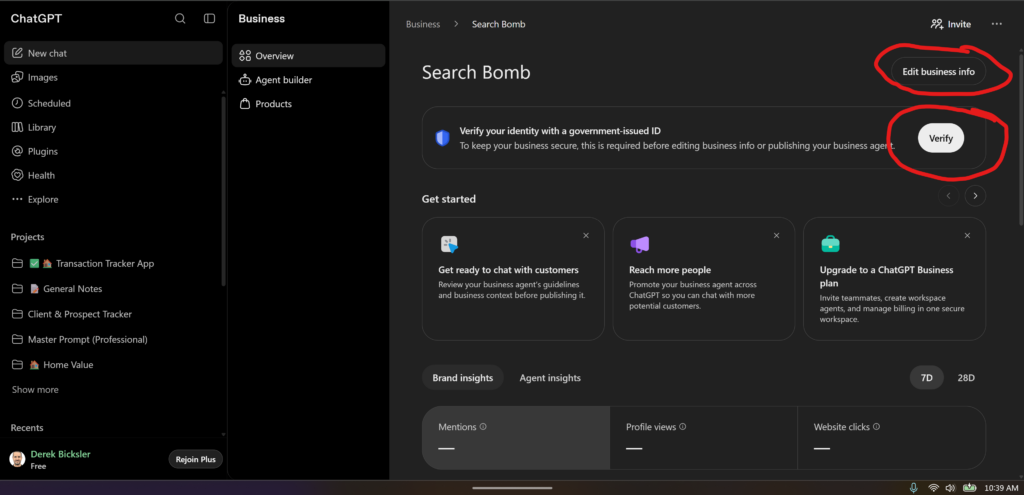
Do further verification via the big button in your business dashboard that says “Verify”. Again, say individual and use SSN to verify rather than a business entity if asked. (Have to take live pictures of the front and back of your state ID, and take 3 live pics of your face)
6. Optimize
Click “Edit Profile” in your ChatGPT Business Profile dashboard to optimize it (again, not much to it at this point and not rocket science)…
A. About
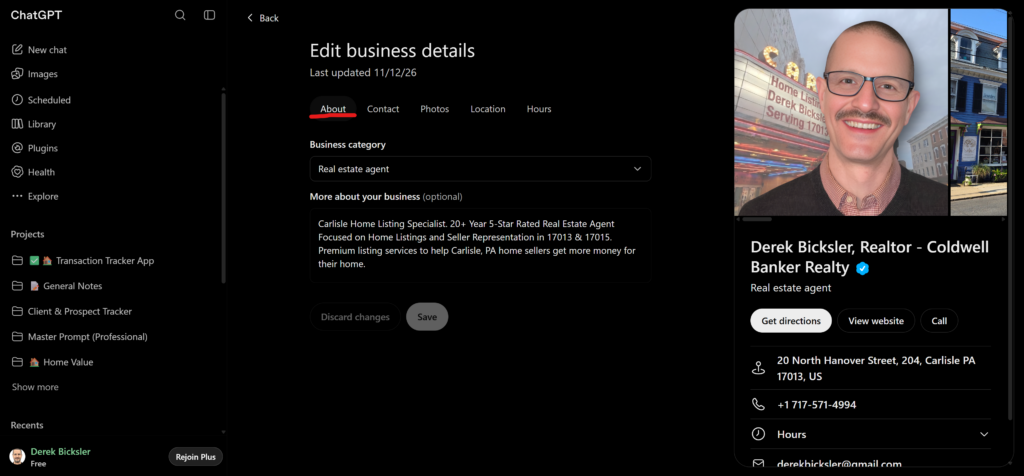
In About tab, Select Category “Real Estate Agent” and insert a Description. Focus on keywords… location, real estate, listing services, buyer agent services, any niches you serve, anything awesome about you… number of reviews, volume, awards, years in service, etc etc. There’s not much space, just cram it packed with as much awesome stuff as possible and don’t be concerned with making it “good writing”.
B. Contact
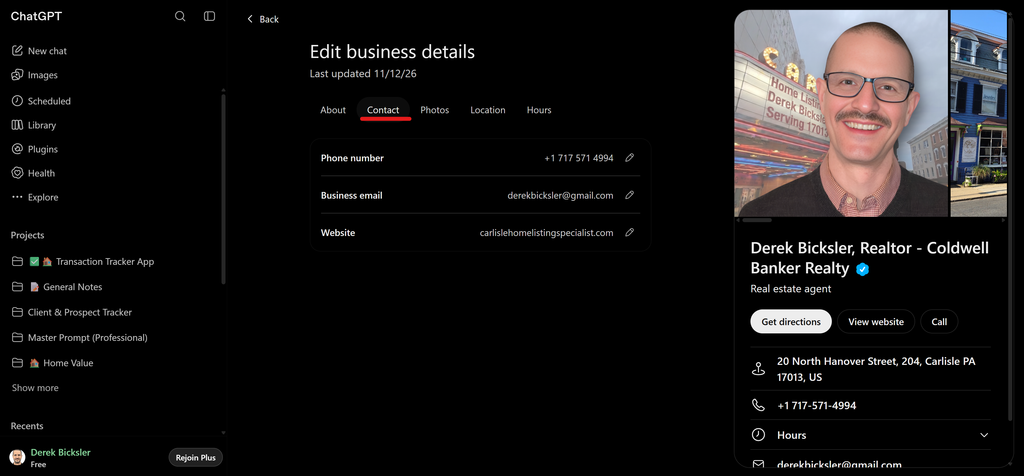
Ensure Contact info is complete and correct.
C. Photos
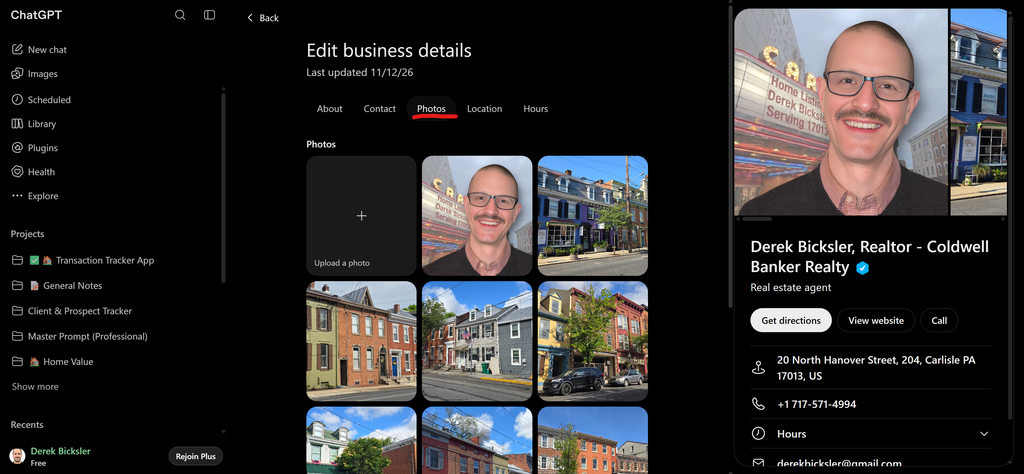
Add Photos. Up to 50. You can choose the order, so keep that in mind and make sure first one is the one you want to be first. Focus on similar photos as what we put on Google Business Profile… a few of your office, a few of you (1st image should be of you), the main listing image of houses you’ve sold, and smiling client images. No graphics or design elements or you or phone numbers or anything on them. Just high resolution pretty pristine classy photos.
D. Location
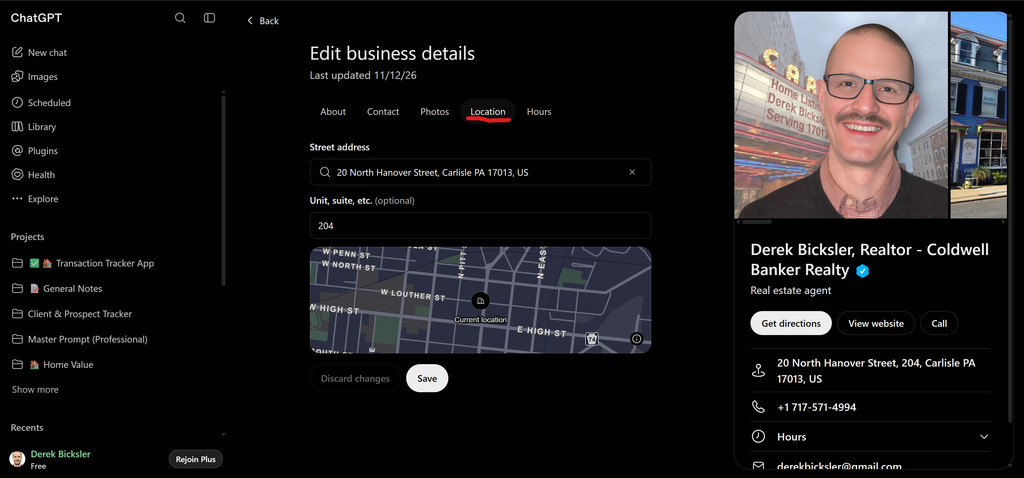
Make sure Location is correct.
E. Hours
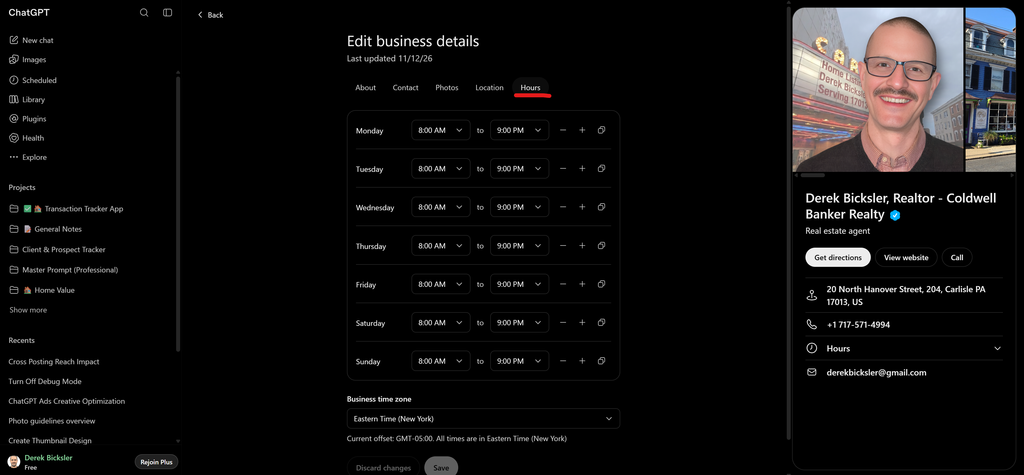
Set Hours to match Google Business Profile. And set the proper time zone.
F. Verify Website
The final step and the only part you might need my or your website person’s help with. Verify your domain/website via your url “DNS” settings.
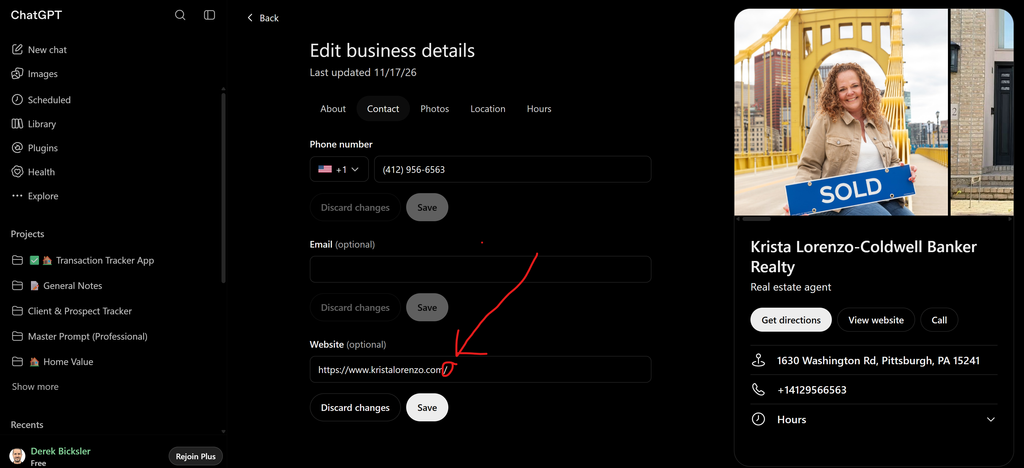
If you go to your website in your dashboard and edit it, it will prompt you to verify your website. Just add a forward slash ( “/” ) at the end of your website url, or delete it if it is already there. Then save it. Upon saving, it should prompt you to verify your website. ( https://KristaLorenzo.com/ «—This slash at the end)
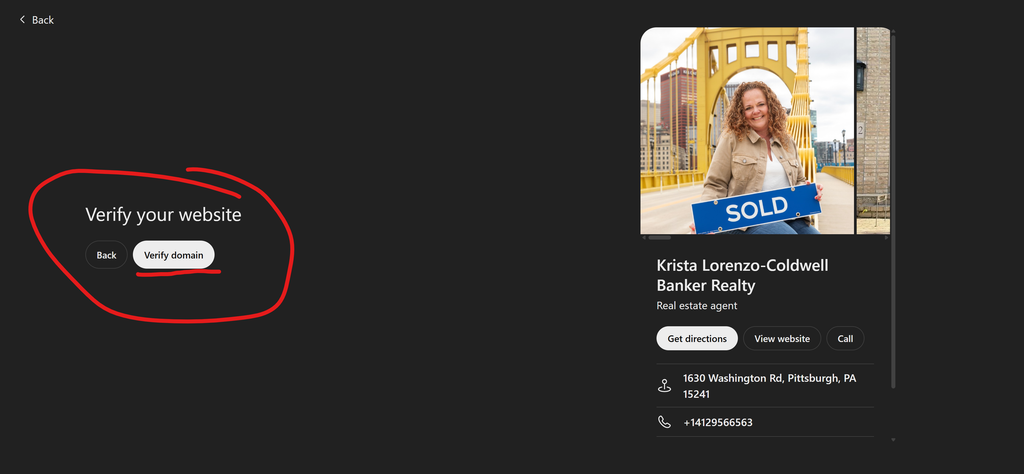
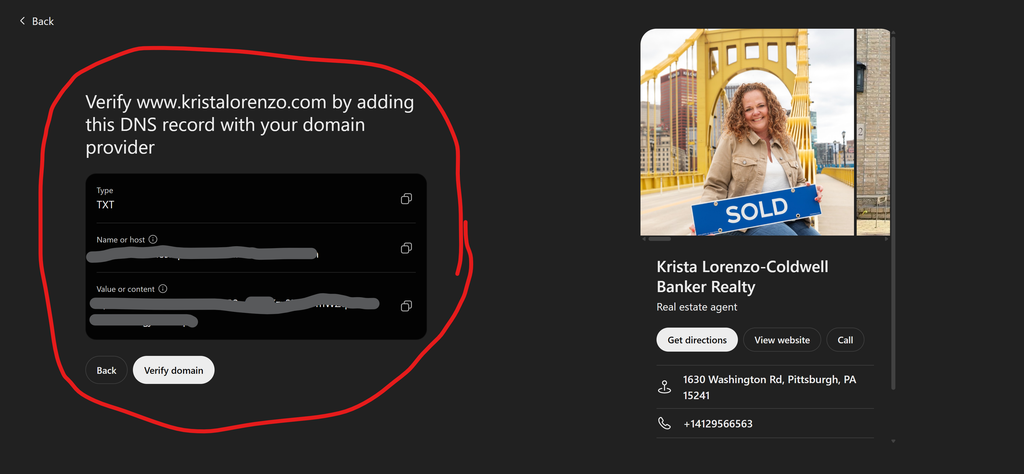
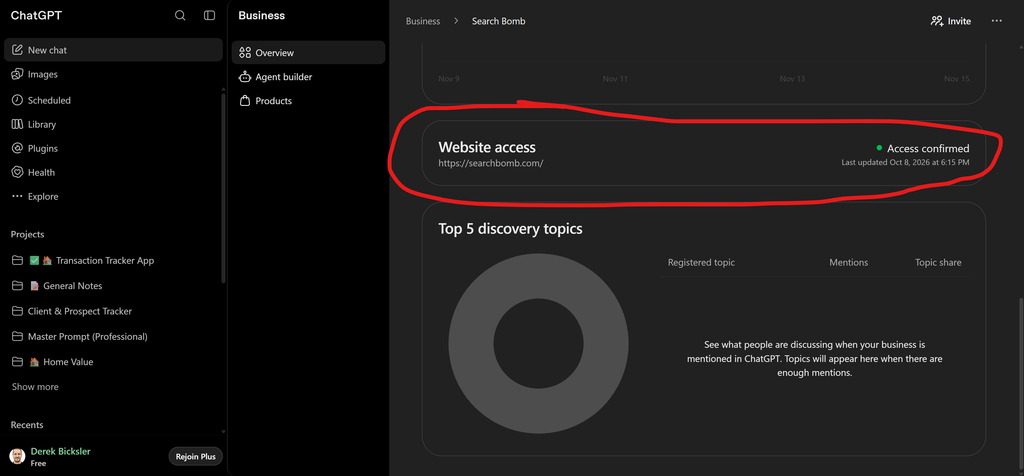
Once your website is properly verified, you will see “Website Access: Access Confirmed” item on your main ChatGPT Business Profile dashboard page.
If you need help with that, it should only take a few minutes assuming you have access to your domain settings… CLICK HERE
Or if you’d like to do a “maintenance and refresher” for your google business profile, local services ads, platforms consistency, website review, and anything else you need help with regarding local SEO or AI visibility; we could address your website verification during that call… CLICK HERE
G. Products
Doesn’t apply to real estate agent profiles.
H. Agent Builder
Not available yet. When available, it will allow for setting up an AI agent to answer people’s questions about your business, etc.
And that’s it for now until they drop more features.